Microcontroller-Controlled LiPo Protection Circuit

Finding myself stuck at home more during the pandemic, one hobby I’ve focused on is robotics. Many of my projects run on batteries and some need to intelligently realize that the charge is running low so that they can take shutdown steps prior to disconnecting the battery.

I’ll also be the first to admit that batteries, particularly LiPos, are not my strong suit and kinda freak me out. I guess I’ve watched one too many YouTube videos….

I present here my design for a LiPo undervoltage detection and protection circuit, controlled by a microcontroller (μC). I take no responsibility for any issues, so if you decide to use it, you do so at your own risk. And I certainly welcome feedback: you can find me on Twitter @RobBotic.

I did look for COTS solutions, but unfortunately none that I could find would leave the decision making to a μC. And who can pass up a good learning opportunity?!?

Here are my goals and requirements for this circuit:

  • Reusable design for many projects.
  • Works with my LiPo battery, which is a 3S (~9.6 – ~12.6V) 5000mAh 20C pack (~100A), but oddly has an XT60 connector, which limits it to 60A. Plenty for me though….
  • Provides undervoltage protection, as these batteries should not be discharged below a certain level. Further, I’d prefer that the circuit completely disconnect, to prevent additional current drain. That way, if I do not unplug the battery right away, it is less of an issue (many protection circuits simply use transistors to disconnect the battery, which still has some current drain).
  • Reverse polarity protection (though with an XT60 connector it will be quite difficult to plug in incorrectly).
  • μC-controlled disconnect. Given one of my projects is a self-balancing robot, it needs to perform a shutdown sequence (put out a kickstand) prior to disconnecting the battery so that it does not fall on its face. Ideally this will work with the μC or single board computer of your choice, such as an Arduino or Raspberry Pi.
  • Largely failsafe. In the event of a short, a μC crash, etc., I’d like the battery to be disconnected.

To operate, a user presses a START button (PBSW1 below), which will power the μC. The μC then samples a voltage divider and determines whether to close a relay. The μC will enter a shutdown sequence (and eventually open the relay / stop powering the relay coil) should the voltage level drop enough in the voltage divider or should a STOP button (PBSW2 below) be pressed.

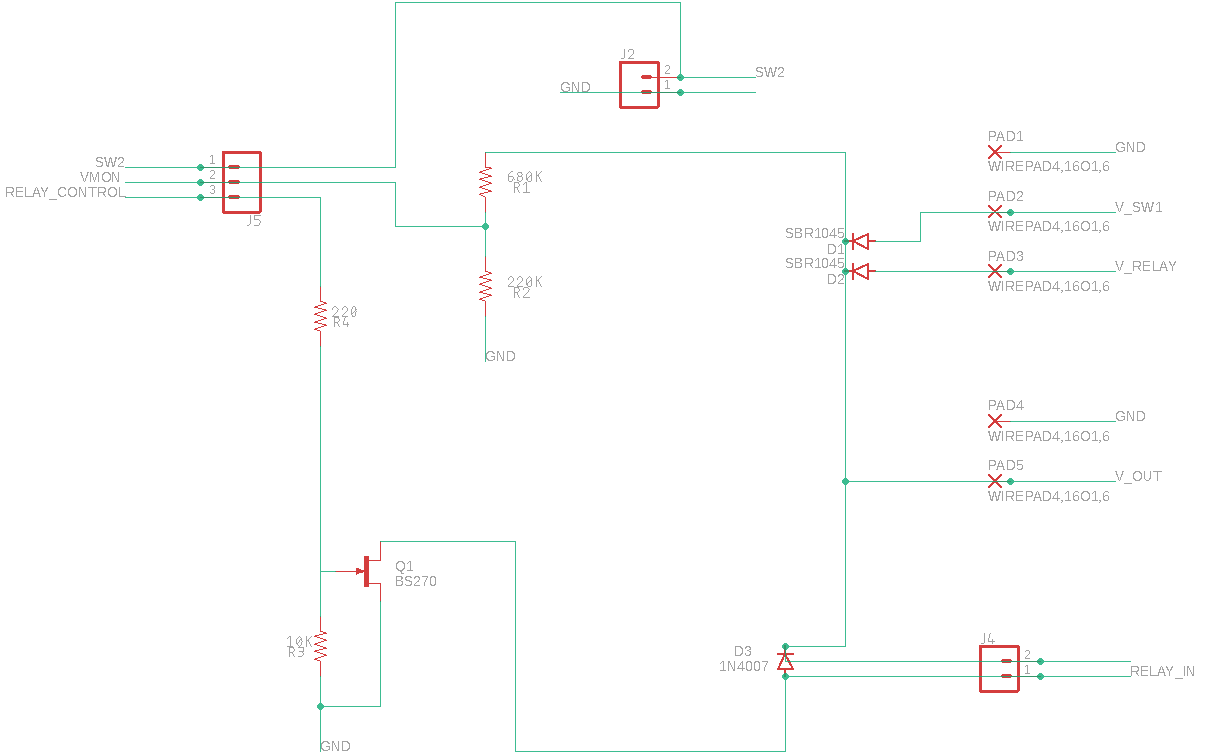
And this is the resulting circuit, both hand drawn and created in EAGLE:
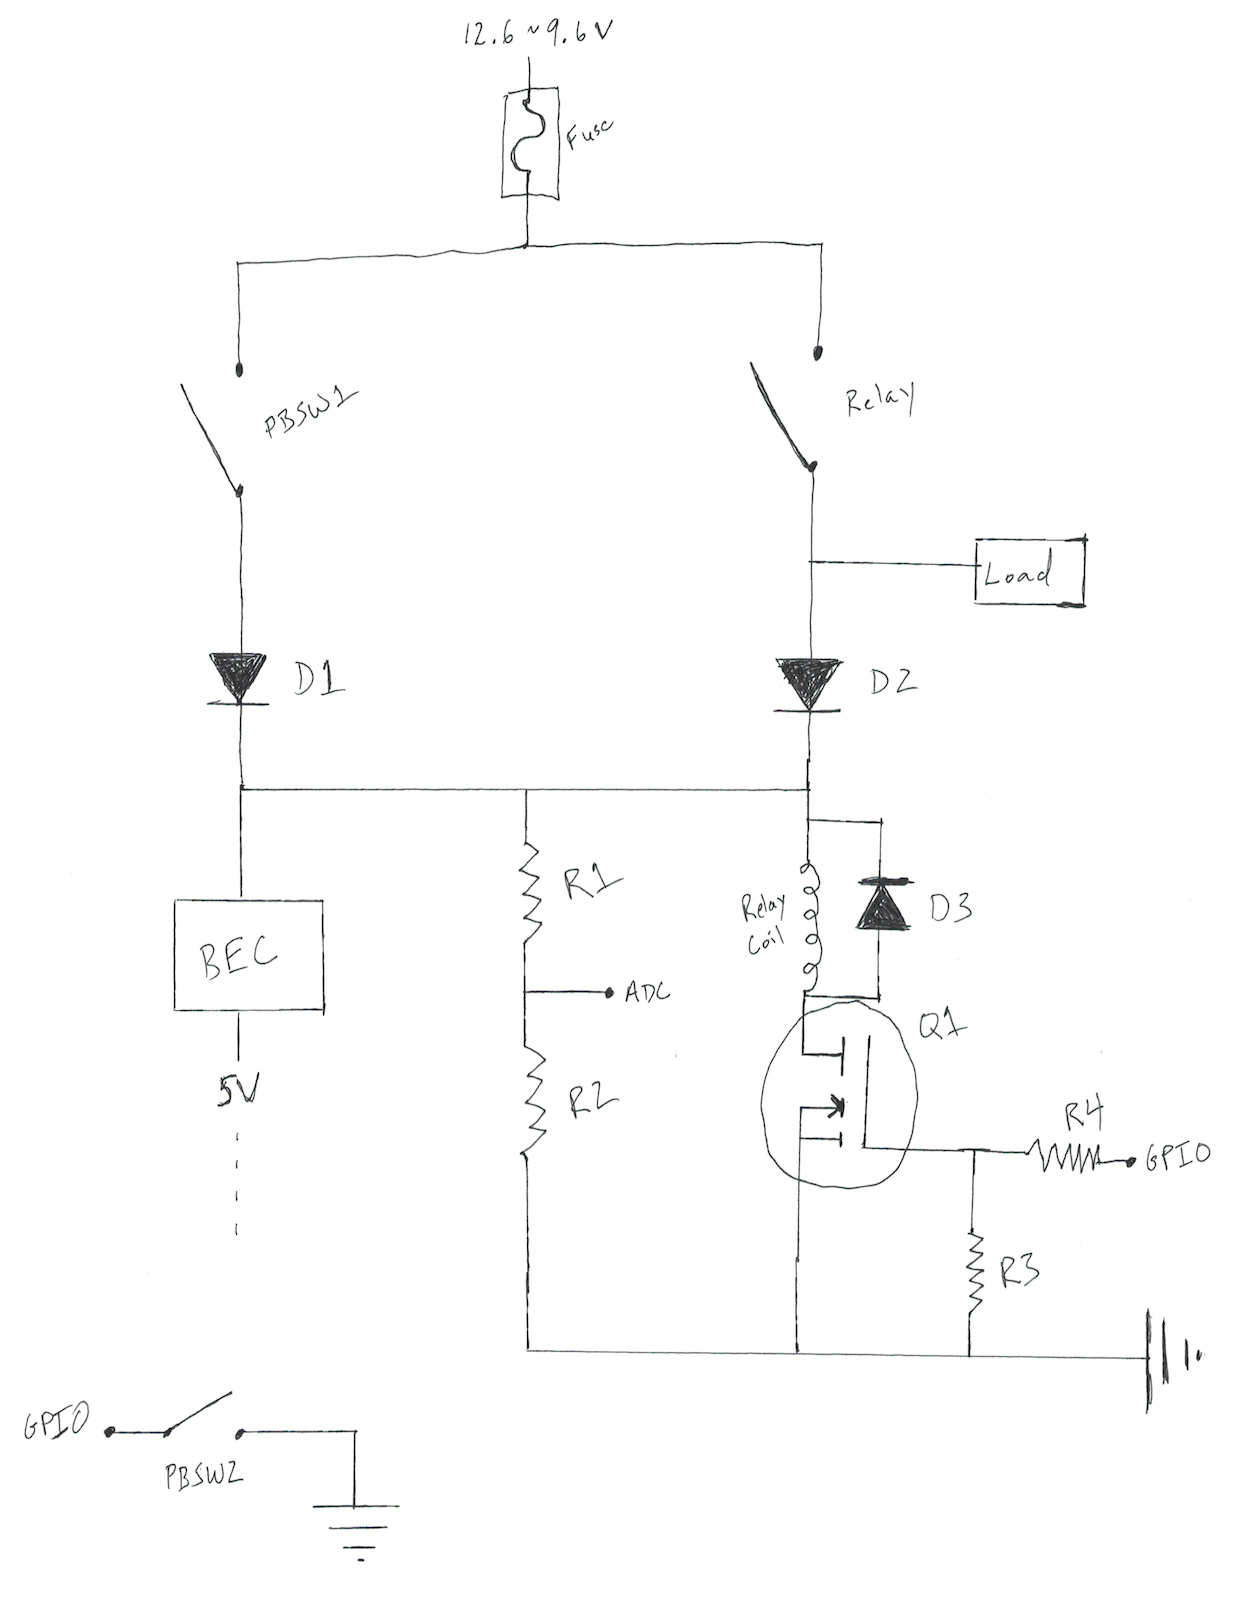
LiPo Protection Circuit Hand Drawn
Hand Drawn Circuit Diagram
LiPo Protection Circuit created in EAGLE
EAGLE Circuit Diagram
BEC
This is simply a buck converter / voltage regulator. It turns out that the RC world calls them BECs (or SBECs or UBECs) and has a pretty good range of robust pieces available. I grabbed this Turnigy UBEC. It is probably overkill at 8A, but I may need some servos on the 5V side.
Fuse
I went with a 60A automotive fuse and soldered on XT60 connectors.
Relay
Once again, I went down the automotive route and used an automotive relay capable of handling a current in excess of 60A. This relay is closed to enable the battery to power both the μC as well as the load.
PBSW1
Momentary switch (normally open) to start the circuit. This switch was chosen to handle the current drawn by the μC, etc., but not the load.
PBSW2
Momentary switch (normally closed) to stop the circuit. The μC monitors this switch for a user request to start the shutdown sequence.
R1 and R2
Voltage divider. The values were chosen to drop the 3S LiPo voltage down to a reasonable level for a 3.3V analog input on the μC. The μC monitors this voltage and starts a shutdown sequence when the voltage falls below a threshold. Similarly, the μC will only close the relay if the voltage is above a (slightly higher for hysteresis) threshold.
R3
Pulldown resistor.
R4
I’ve read that this resistor may not be necessary with a MOSFET, but better safe than sorry.
D1
Reverse polarity protection, conveniently with the same voltage drop as D2. Note that I only need reverse polarity protection here, as the circuit is always initially powered on this side.
D2
Protects PBSW1 from the load current. Thus, the load is only powered via the relay and not when PBSW1 is pressed.
D3
Flyback diode.
Q1
N-channel MOSFET. I went with a logic-level MOSFET instead of the more common BJT to minimize the current, as Q1 is always energized while the relay is closed. The μC outputs to Q1 to close the relay / power the relay coil, as the μC itself cannot provide the current required to close the relay. Note that I went with a BS270 here, but will likely reevaluate that decision in the near future, as the BS270 works well for 5V logic, but not 3.3V logic.

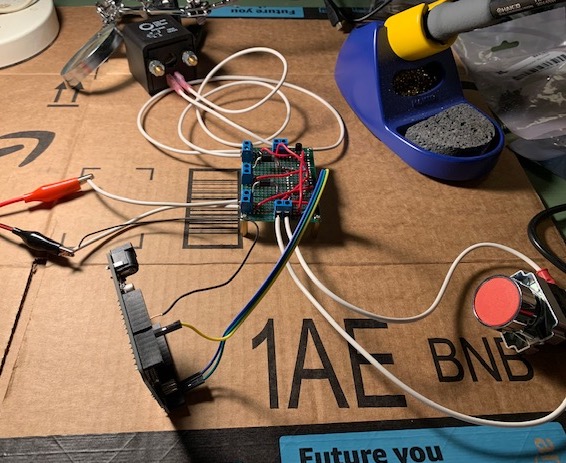
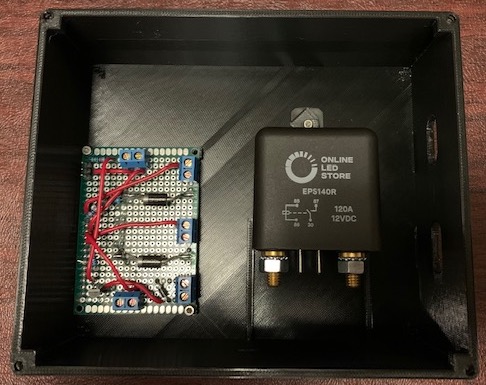
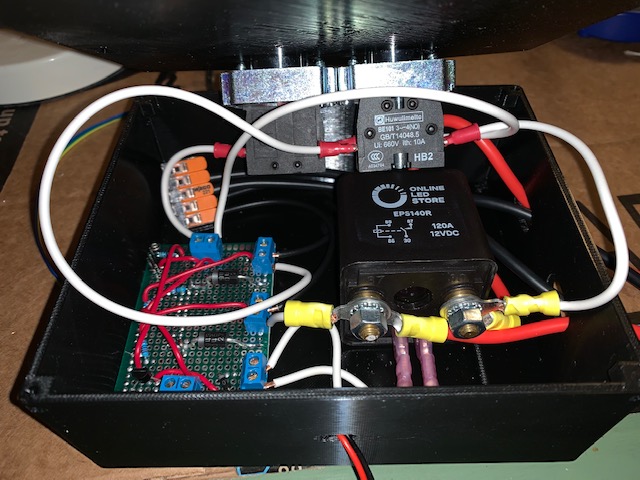
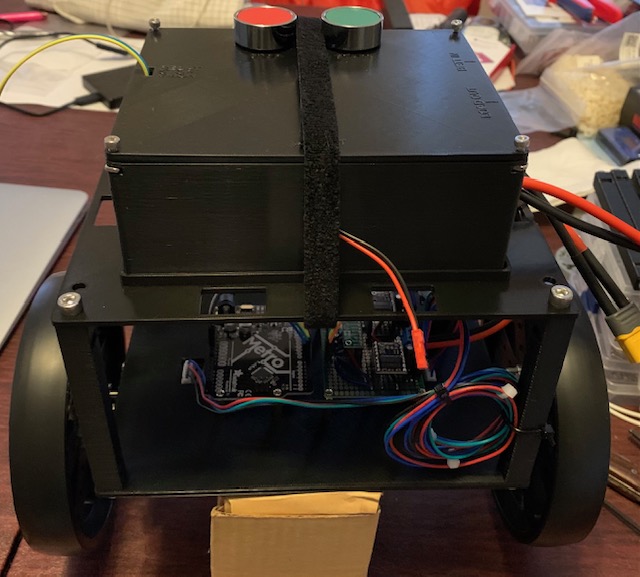
And here is the resulting make, complete with my not-so-great soldering skills and a 3D-printed box (printed with my beloved Prusa I3 MK3S):
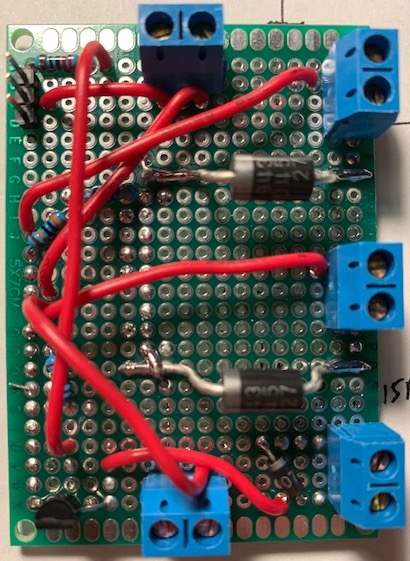
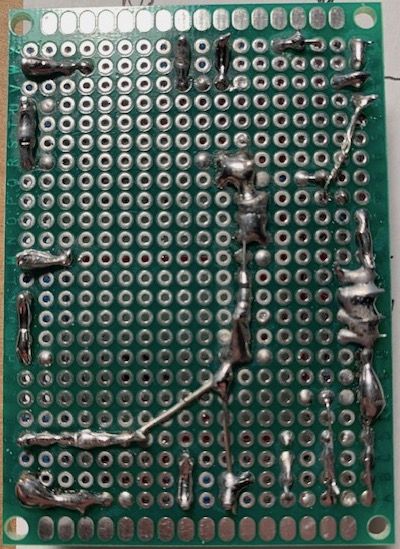
LiPo Protection Circuit Perfboard Top
Top
LiPo Protection Circuit Perfboard Bottom
Bottom
LiPo Protection Circuit on Perfboard
LiPo Protection Circuit Testing
Testing
LiPo Protection Circuit 3D Printed Box 1
3D Printed Container
LiPo Protection Circuit 3D Printed Box 2
Fully Assembled
LiPo Protection Circuit Assembled on Robot

Let me know what you think.

Still Here, Now with Jekyll and GitHub!

So, obviously I have not been good at updating my website / blogging. And I’m guessing I am not alone.

BUT, I have been busy.

In the professional world, I was appointed chair of the IEEE-SA Corporate Advisory Group, which also means a seat on the IEEE-SA Board of Governors. I’m really enjoying the experience and helping to shape IEEE-SA and standards. And a standard I chair, IEEE 2030.5, has been selected for smart inverter communications as part of California’s Rule 21!

In the personal world, there has also been a lot of activity. Sadly, I lost my best friend of 16 years (and I plan to write a future post on elderly dog care), but I also have had lots of good and interesting experiences as well!

As for this site itself, I’ve migrated away from WordPress. I figure if I am not good at regularly updating my content, I’m likely not good at updating the WordPress engine as well. Now the site hopefully looks very similar, but is built using Jekyll (static!) and hosted on GitHub. I’ll spare you the details as there are many excellent tutorials on the process already out there.

Oh - and if you visited before, the Deuterium project is still alive and well.

Stay tuned - I have several future posts planned!

RESTful HTTP Client in a Browser using JavaScript

A frustration I’ve often faced when interacting with RESTful HTTP servers is that browsers make poor RESTful HTTP clients. Specifically, browsers only support the GET and POST methods and do not allow you to specify media types or other header values. This does not make for simple, self-served, human interfaces in the IoT world.

It turns out, with a little JavaScript magic, your browser can make a pretty decent RESTful HTTP client.

The code snippets below show how to perform a GET with a specified Accept header as well as a PUT with a specified Content-Type header. I’ll leave the extension to other methods and headers as an exercise to the reader.

function getOnOff(contentType)
{
    var xmlhttp = new XMLHttpRequest();
    var ds = "";
    xmlhttp.open("GET", "/onoff");
    xmlhttp.setRequestHeader("Accept", contentType);
    xmlhttp.onreadystatechange = function()
    {
        if(xmlhttp.readyState == 4)
        {
            ds = xmlhttp.responseText;
            document.forms[0].textArea1.value = ds;
        }
    }
    xmlhttp.send();
}

function putOnOff(state, contentType)
{
    var xmlhttp = new XMLHttpRequest();
    xmlhttp.open("PUT", "/onoff");
    xmlhttp.setRequestHeader("Content-Type", contentType);
    if(contentType == "application/xml")
    {
        if(state == "on")
        {
            xmlhttp.send("<OnOff>\n\t<state>on</state>\n</OnOff>");
        }
        else if(state == "off")
        {
            xmlhttp.send("<OnOff>\n\t<state>off</state>\n</OnOff>");
        }
    }
    else if(contentType == "application/json")
    {
        if(state == "on")
        {
            xmlhttp.send("{\n\"state\": \"on\"\n}");
        }
        else if(state == "off")
        {
            xmlhttp.send("{\n\"state\": \"off\"\n}");
        }
    }
}

I’ve integrated a page with similar functions into the Deuterium demo to provide a simple human interface. The demo server simply serves up this page and the user can easily interact RESTfully with the server’s resources. Check out the Deuterium test servers to see this in action.

One limitation (unless you want to fool around with your browser’s security settings) is that these snippets are subject to cross domain scripting restrictions, making a generic client less easy. At that point, you may want to look into various browser plugins.

As a bonus, if your browser supports HTTP/2, then this trick will work seamlessly with HTTP/2 (essentially the JavaScript utilizes whatever transport the browser is using).

Implementing HTTP/2 with mbed TLS

I’ve recently been exploring mbed TLS and thought I’d share some numbers I’ve found.

First, the specifics:

  • mbed TLS version: 1.3.10
  • Compiler: arm-none-eabi-gcc (GNU Tools for ARM Embedded Processors) 4.9.3 20141119 (release) [ARM/embedded-4_9-branch revision 218278]
  • Processor: TI CC3200 (ARM Cortex-M4 core)

As I’ve been primarily focused on an HTTP/2 server here, I configured mbed TLS to support the mandatory to implement (MTI) ciphersuite for HTTP/2, TLS-ECDHE-RSA-WITH-AES-128-GCM-SHA256, along with various required features such as SNI, ALPN, and X.509 certificates. This resulted in a config.h file with the following items #define’ed:

  • POLARSSL_HAVE_LONGLONG
  • POLARSSL_HAVE_ASM
  • POLARSSL_HAVE_IPV6
  • POLARSSL_PLATFORM_PRINTF_ALT
  • POLARSSL_PLATFORM_FPRINTF_ALT
  • POLARSSL_REMOVE_ARC4_CIPHERSUITES
  • POLARSSL_ECP_DP_SECP256R1_ENABLED
  • POLARSSL_KEY_EXCHANGE_ECDHE_RSA_ENABLED
  • POLARSSL_NO_PLATFORM_ENTROPY
  • POLARSSL_PKCS1_V15
  • POLARSSL_SSL_EXTENDED_MASTER_SECRET
  • POLARSSL_SSL_DISABLE_RENEGOTIATION
  • POLARSSL_SSL_MAX_FRAGMENT_LENGTH
  • POLARSSL_SSL_PROTO_TLS1_2
  • POLARSSL_SSL_ALPN
  • POLARSSL_SSL_SERVER_NAME_INDICATION
  • POLARSSL_SSL_TRUNCATED_HMAC
  • POLARSSL_SSL_SET_CURVES
  • POLARSSL_X509_CHECK_KEY_USAGE
  • POLARSSL_X509_CHECK_EXTENDED_KEY_USAGE
  • POLARSSL_AES_C
  • POLARSSL_ASN1_PARSE_C
  • POLARSSL_BIGNUM_C
  • POLARSSL_CIPHER_C
  • POLARSSL_CTR_DRBG_C
  • POLARSSL_ECDH_C
  • POLARSSL_ECP_C
  • POLARSSL_ENTROPY_C
  • POLARSSL_GCM_C
  • POLARSSL_MD_C
  • POLARSSL_OID_C
  • POLARSSL_PK_C
  • POLARSSL_PK_PARSE_C
  • POLARSSL_PLATFORM_C
  • POLARSSL_RSA_C
  • POLARSSL_SHA256_C
  • POLARSSL_SSL_CACHE_C
  • POLARSSL_SSL_SRV_C
  • POLARSSL_SSL_TLS_C
  • POLARSSL_X509_USE_C
  • POLARSSL_X509_CRT_PARSE_C
  • SSL_CIPHERSUITES TLS_ECDHE_RSA_WITH_AES_128_GCM_SHA256

With this config.h in place, I executed the following command: CC=arm-none-eabi-gcc AR=arm-none-eabi-ar CFLAGS+=”-mthumb -mcpu=cortex-m4 -ffunction-sections -fdata-sections” make lib

This resulted in a static library (libmbedtls.a) with a size of 238972 bytes. Keep in mind that this is doing everything in software (AES, SHA, ECC, etc.).

One trick I learned along the way: It’s best to store your certificates and keys in DER format — no PEM. This allows you to remove POLARSSL_PEM_PARSE_C and POLARSSL_BASE64_C. With this trick, I went from a static library (libmbedtls.a) with a size of 243536 bytes to one with a size of 238972 bytes. This method also reduces size of the certificates and keys themselves.

That’s it for now - I hope you find these tips helpful!

Open Source Software — Who Actually Reviews the Code?

This post is co-authored by Robby Simpson and Sven Krasser. So, you can find it on both Robby’s and Sven’s blogs — you should check them both out!

Last year saw a large number of critical bugs in open source software (OSS). These bugs received a lot of media attention and re-opened the discussion of bugs and security in OSS. This has led many to question whether ESR’s famous statement that “Given enough eyeballs, all bugs are shallow” holds true.

There are two aspects to consider here: first, does bug discovery parallelize well? Particularly for subtle security-related bugs, a large number of users does not necessarily aid discovery, but rather a dedicated review effort may be required. We’ll leave this aspect for a separate discussion…

Second, are there actually more eyeballs looking at open source software? For that question, we have some data to contribute to the discussion. In 2003, Robby released NETI@home, a project to gather network performance metrics from endhosts, as part of his PhD dissertation work at Georgia Tech. You can find the source code on SourceForge. The NETI@home agent runs on end user machines and gathers various network performance data (e.g., numbers of flows per protocol, number of packets per flow, TCP window size). Such data has many uses, including improving models in network simulations and observing suspicious traffic patterns.

A driving factor for releasing NETI@home as OSS stems from the fact that it gathers a lot of information that could raise privacy concerns with users. The most forthcoming way to address these concerns, which could hinder adoption, is to allow users to actually read the code. And as researchers that piqued our curiosity — how many users have these concerns and will further review the source code?

How could we measure this user code review? Download stats for the source code are an option, but they don’t tell us much about users actually looking at the code. Instead, we placed a comment in the section of code where privacy preferences are honored, which reads:

/*
* You have found the "hid-
* den message!" Please visit
* http://www.neti.gatech.edu/sec/sec.html
* and log in as user 'neti'
* and pw 'hobbit'
*/

The web page mentioned in this comment contained an explanation along with an email address (it was taken down around 2009). Visiting such a link requires a lower threshold than sending an email, so we were looking for both pageviews of that page along with emails to the address given on that page. The former would have told us someone found the comment while the latter would confirm that someone would have taken action on it. However, we didn’t receive any pageviews (and therefore we didn’t receive any emails either).

To put this into perspective with NETI@home’s user base, there were about 13,000 downloads of the software, and there were about 4,500 active users that ran the agent. We can safely say that the type of user running the software falls into the geek category, so there’s some expected selection bias with respect to taking an interest in the source code.

Granted, this is slightly different than contributors to an open source project reviewing code. Nonetheless, it came as a surprise to us, and it certainly went against the conventional wisdom at the time.

As fans of OSS, we were both disappointed in the results. However, we hope that sharing this data point will add to the larger discussion, help strengthen the open source community, and show the need for dedicated code review.

First IoT Device with HTTP/2?

As far as I know, this is the first embedded / Internet of Things device to run HTTP/2!

TI CC3200 LaunchPad running an HTTP/2 server

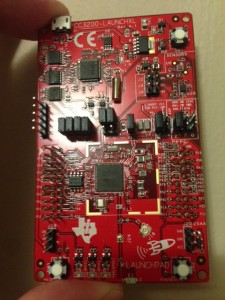
This particular platform is a Texas Instruments CC3200 LaunchPad. The CC3200 is a Wi-Fi SoC that incorporates an ARM Cortex-M4 and Wi-Fi into a single piece of silicon.

Over the past couple of days, I ported the Deuterium HTTP/2 library to the CC3200 and set up a simple HTTP/2 server with a RESTful interface to one of the onboard LEDs.

I went with Wi-Fi in this case (as opposed to 802.15.4, for example) so that I can easily show it off at the upcoming IETF in Dallas.

Granted, I had 256 KB of RAM and BSD socket support to work with, so no huge accomplishment… But, it still demonstrates the capabilities of HTTP/2 for the Internet of Things.

Kudos to TI for such a good product!

If you are interested in using HTTP/2 on this or another embedded platform, check out the Deuterium HTTP/2 library.

HTTP/2 and the Internet of Things

I have never been a fan of using custom or obscure protocols to talk to embedded devices, particularly if the goal is to bring them into the mainstream of communications (e.g., the Internet of Things). I’m looking at you CoAP, MQTT, etc.!

It’s not that CoAP, MQTT, and all of the others aren’t well designed, useful, or perhaps even better. It’s that they are not what the rest of the Internet are using to communicate.

So, what is? Well, I think we all know the answer to that: HTTP. Even email, which has always had its own protocols, is largely using HTTP at this point.

The HTTP we all know and love, HTTP/1.1, is poorly suited to embedded devices. Its use of loose, plain ASCII makes for complex parsing (codespace!) and eats up a lot of RAM and buffer space. Then, when you try and shuffle all of those ASCII characters across the network, you eat up bandwidth — something embedded devices often do not have in abundance. Further, transmitting bits takes energy – a particular problem if you are battery-powered.

Well, I’m hoping that the next version of HTTP, HTTP/2, helps to lessen those problems. Of course it will not be as efficient and great for embedded devices as a protocol designed for the embedded space, but consideration was given to the embedded space during the design of HTTP/2. And the goals of the large Web servers often align with those of the embedded space — less memory and bandwidth also matter if you are serving millions of clients!

How does HTTP/2 help? Well, for starters, it employs a very efficient, yet low memory (unlike gzip) compression technique, HPACK. HPACK works by assigning header names and values to entries in tables. Then, only the entry number needs to be used. This allows for efficient use of bandwidth while not sacrificing the original syntax of HTTP. The sizes of the tables can be limited via negotiation, limiting RAM usage.

What about the complex parsing, you ask? Well, it’s not entirely gone, but HTTP/2 did a lot to try and tighten the syntax and thus the parsing. As with all new protocols, a lot of the legacy could be dropped or tightened. Finally, for those header names and values that may not warrant entry into the tables built up between server and client, Huffman codes can be used. Canonical Huffman codes, in fact.

HTTP/2 also encourages each client/server pair to use a single TCP connection. Individual requests and their responses are sent in streams over this connection. Once again, the number of simultaneous streams can also be limited via negotiation. This connection reuse means less network overhead – no more three-way handshake for each request/response, no more slow start over and over again, no more TLS renegotiation over and over again. You get the point. And considering IoT devices tend to focus on short messages, the benefits really add up.

Other features of HTTP/2 that are particularly beneficial to the embedded world include: binary message framing, header list size negotiation, server push, ping, and windowing. Each of these could definitely use a lot more description, but I’m hoping to avoid “tl;dr”.

In conclusion, I believe that HTTP/2, while not perfect, will allow embedded/IoT devices to fully join the rest of the Internet and no longer be second-class citizens. Truly enabling the Web of Things!

If you are interested in using HTTP/2 for an IoT application, check out Deuterium, my own embedded implementation of HTTP/2.